
From Zero to Spark Cluster in Under 10 Minutes
Objective
In this no frills post, you’ll learn how to setup a big data cluster on Amazon EMR in less than ten minutes.
Prerequisites
- You have an AWS account.
- You have setup a Key Pair.
- You have
ChromeorFirefox - You have basic familiarity with the command line.
- You have basic familiarity with Python. (Optional)
1 - Foxy Proxy Setup (Optional: only for Zeppelin)
- In
ChromeorFirefox, add the FoxyProxy extension. - Restart browser after installing FoxyProxy.
- Open your favorite text editor and save this code as foxyproxy-settings.xml. Keep track of where you save it.
- In your browser, click on the
FoxyProxy iconlocated at top right. - Scroll down and click
Options. - Click
Import/Exporton left-hand side. - Click
Choose File. - Select
foxyproxy-settings.xml. - Click
Open. - Congratulations, Foxy Proxy is now setup.
2 - EMR Cluster Setup
- Login in to AWS.
- Navigate to
EMRlocated under Analytics.

- Click the
Create clusterbutton.
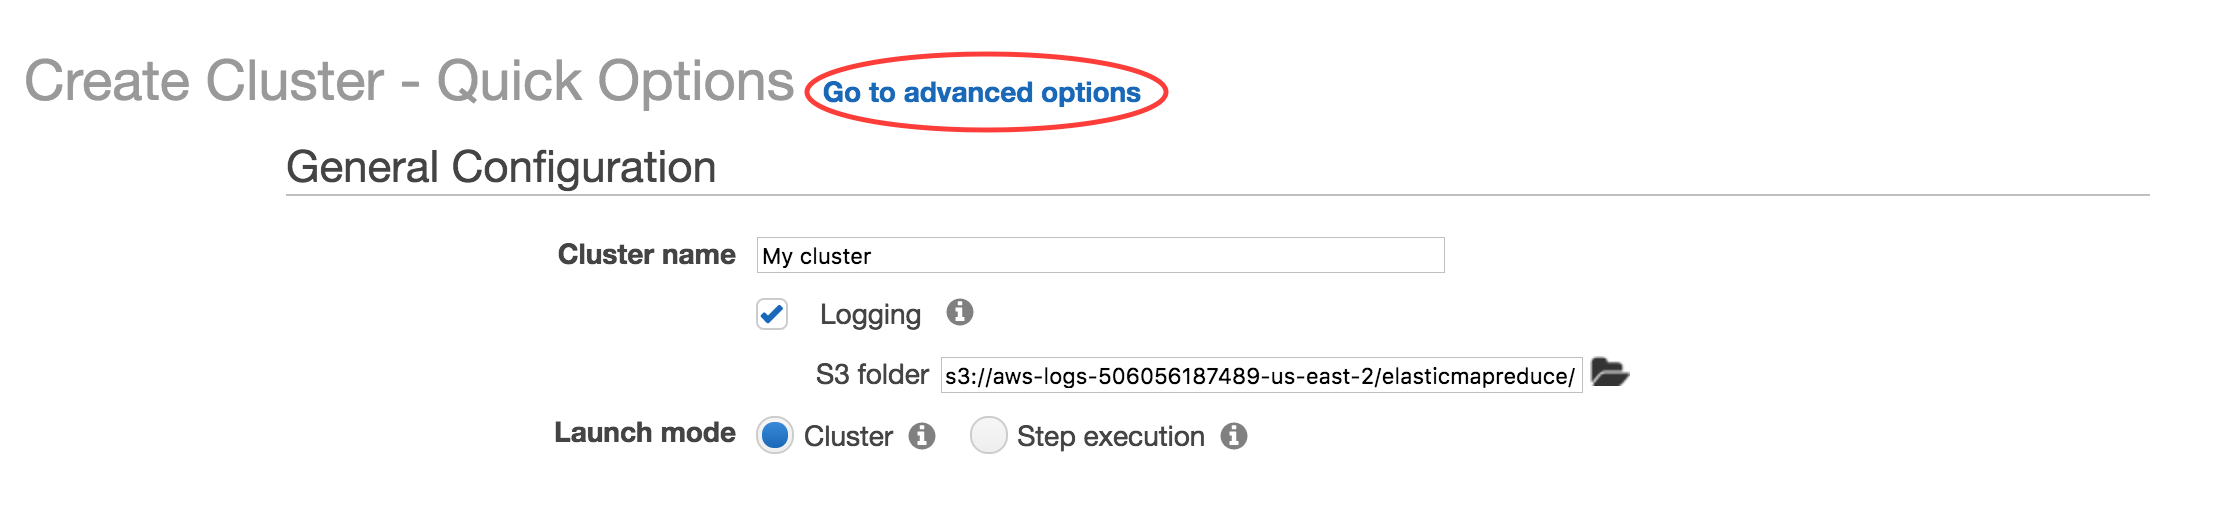
- You are now in Step 1: Software and Steps. Click
Go to advanced options. Here you can name your cluster and select whichever S3 bucket you want to connect to.
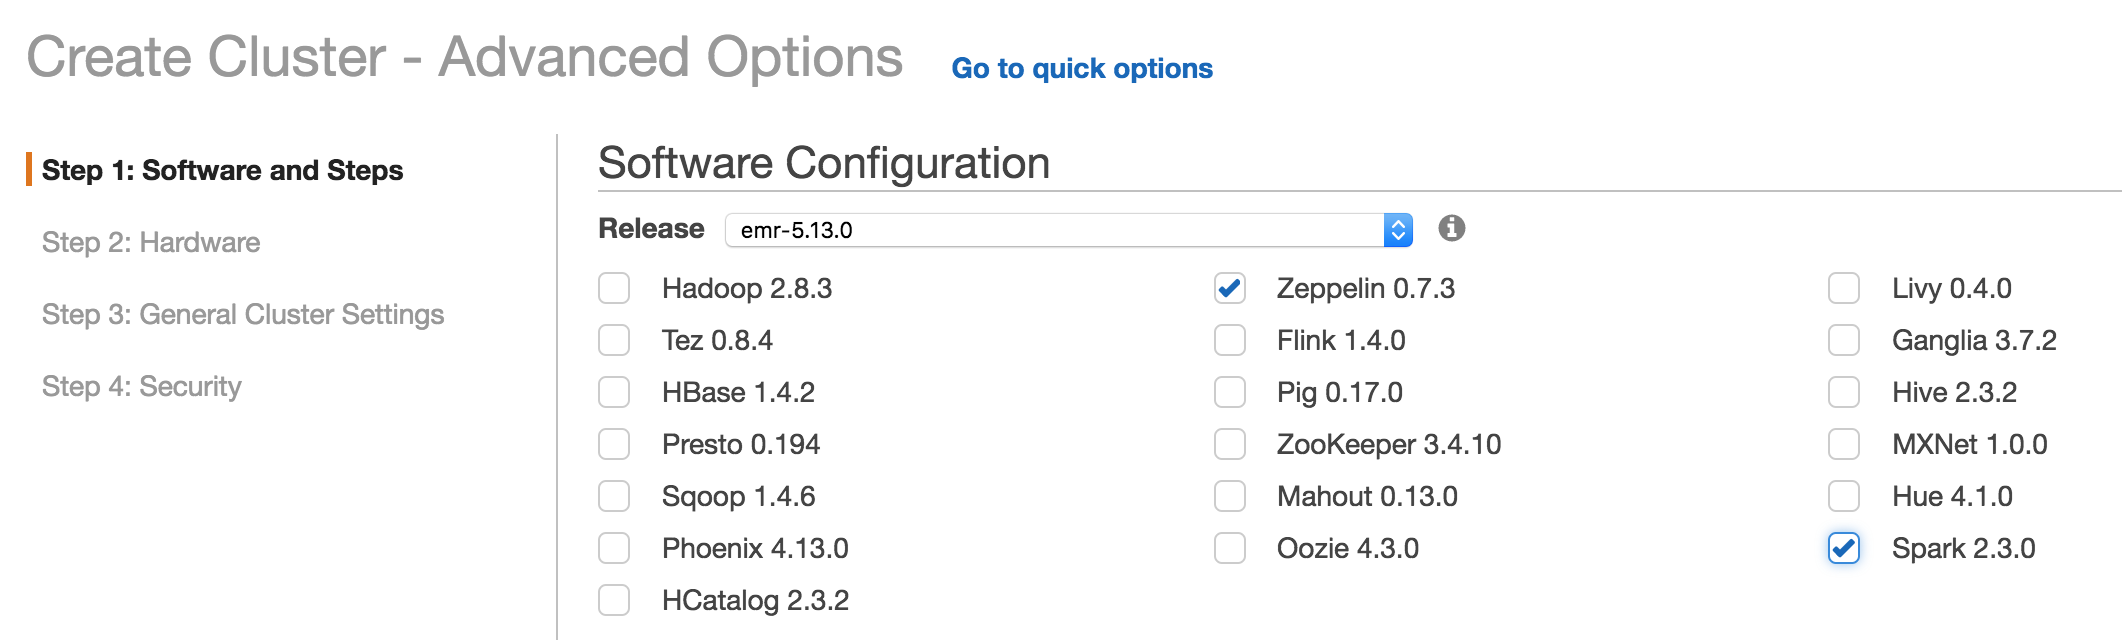
- Click the big data tools you require. I’ll select
SparkandZeppelinfor this tutorial.
- Click
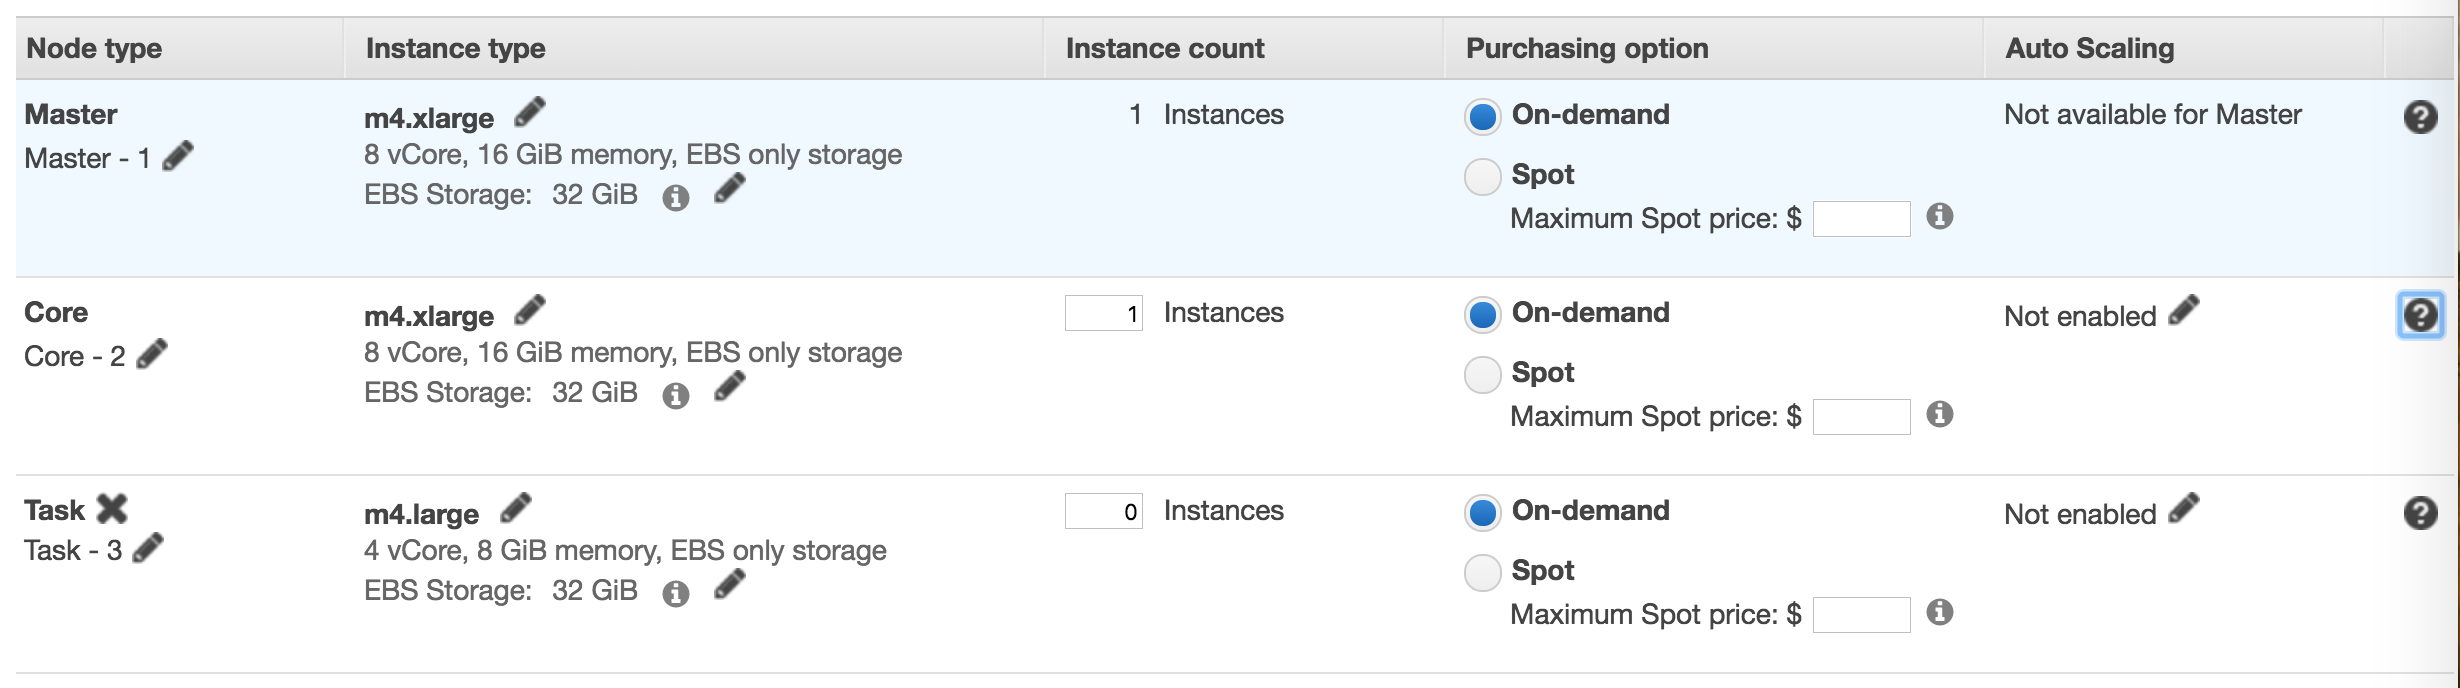
Nextat bottom right of screen. - In Step 2: Hardware, select the instance types, instance counts, on-demand or spot pricing, and auto-scaling options.
- For this tutorial we’ll simply change the instance type to
m4.xlargeand Core to 1 instance. Everything else will remain as default. See the following picture for details.
- Click
Nextat bottom right of screen. - The next page is Step 3: General Cluster Settings Here you have the chance to rename your cluster, select S3 bucket, and add a bootstrap script - among other options.
- Click
Nextat bottom right of screen. - The next page is Step 4: Security. It is imperative that you select a predefined key pair. (Do NOT proceed without a key!)
- Click
Create clusterat bottom right of screen. A new screen pops up that looks like this:
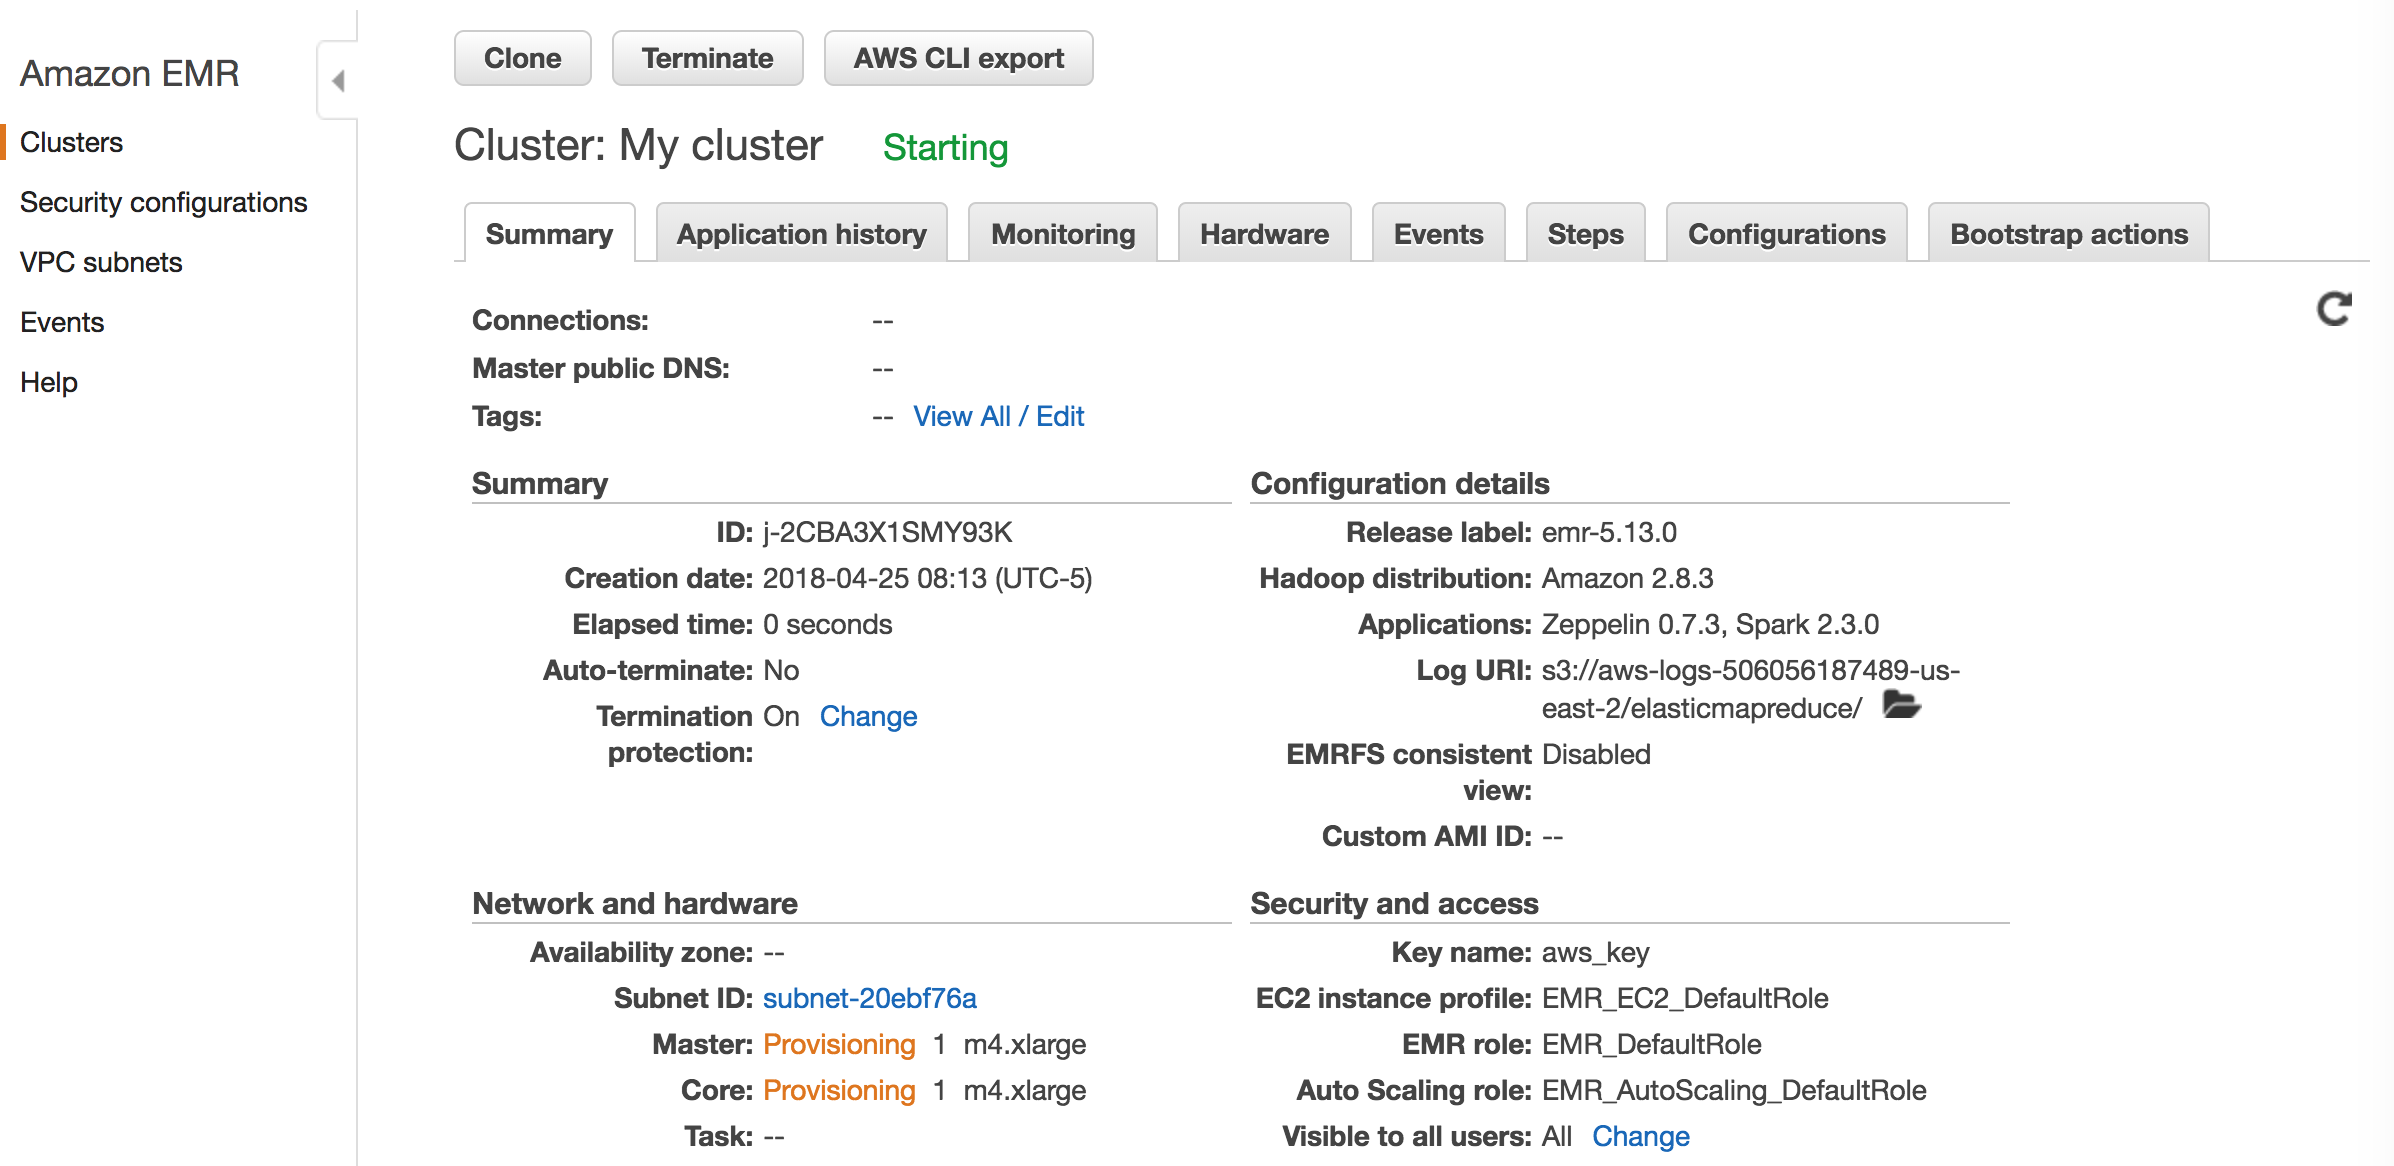
- Your cluster is finished building when you see a status of Waiting in green. (Be patient as this will take 5+ minutes depending on which big data software you installed. It’s not unusual for the build process to take 10-15 minutes or more.) Here’s what a complete build looks like:
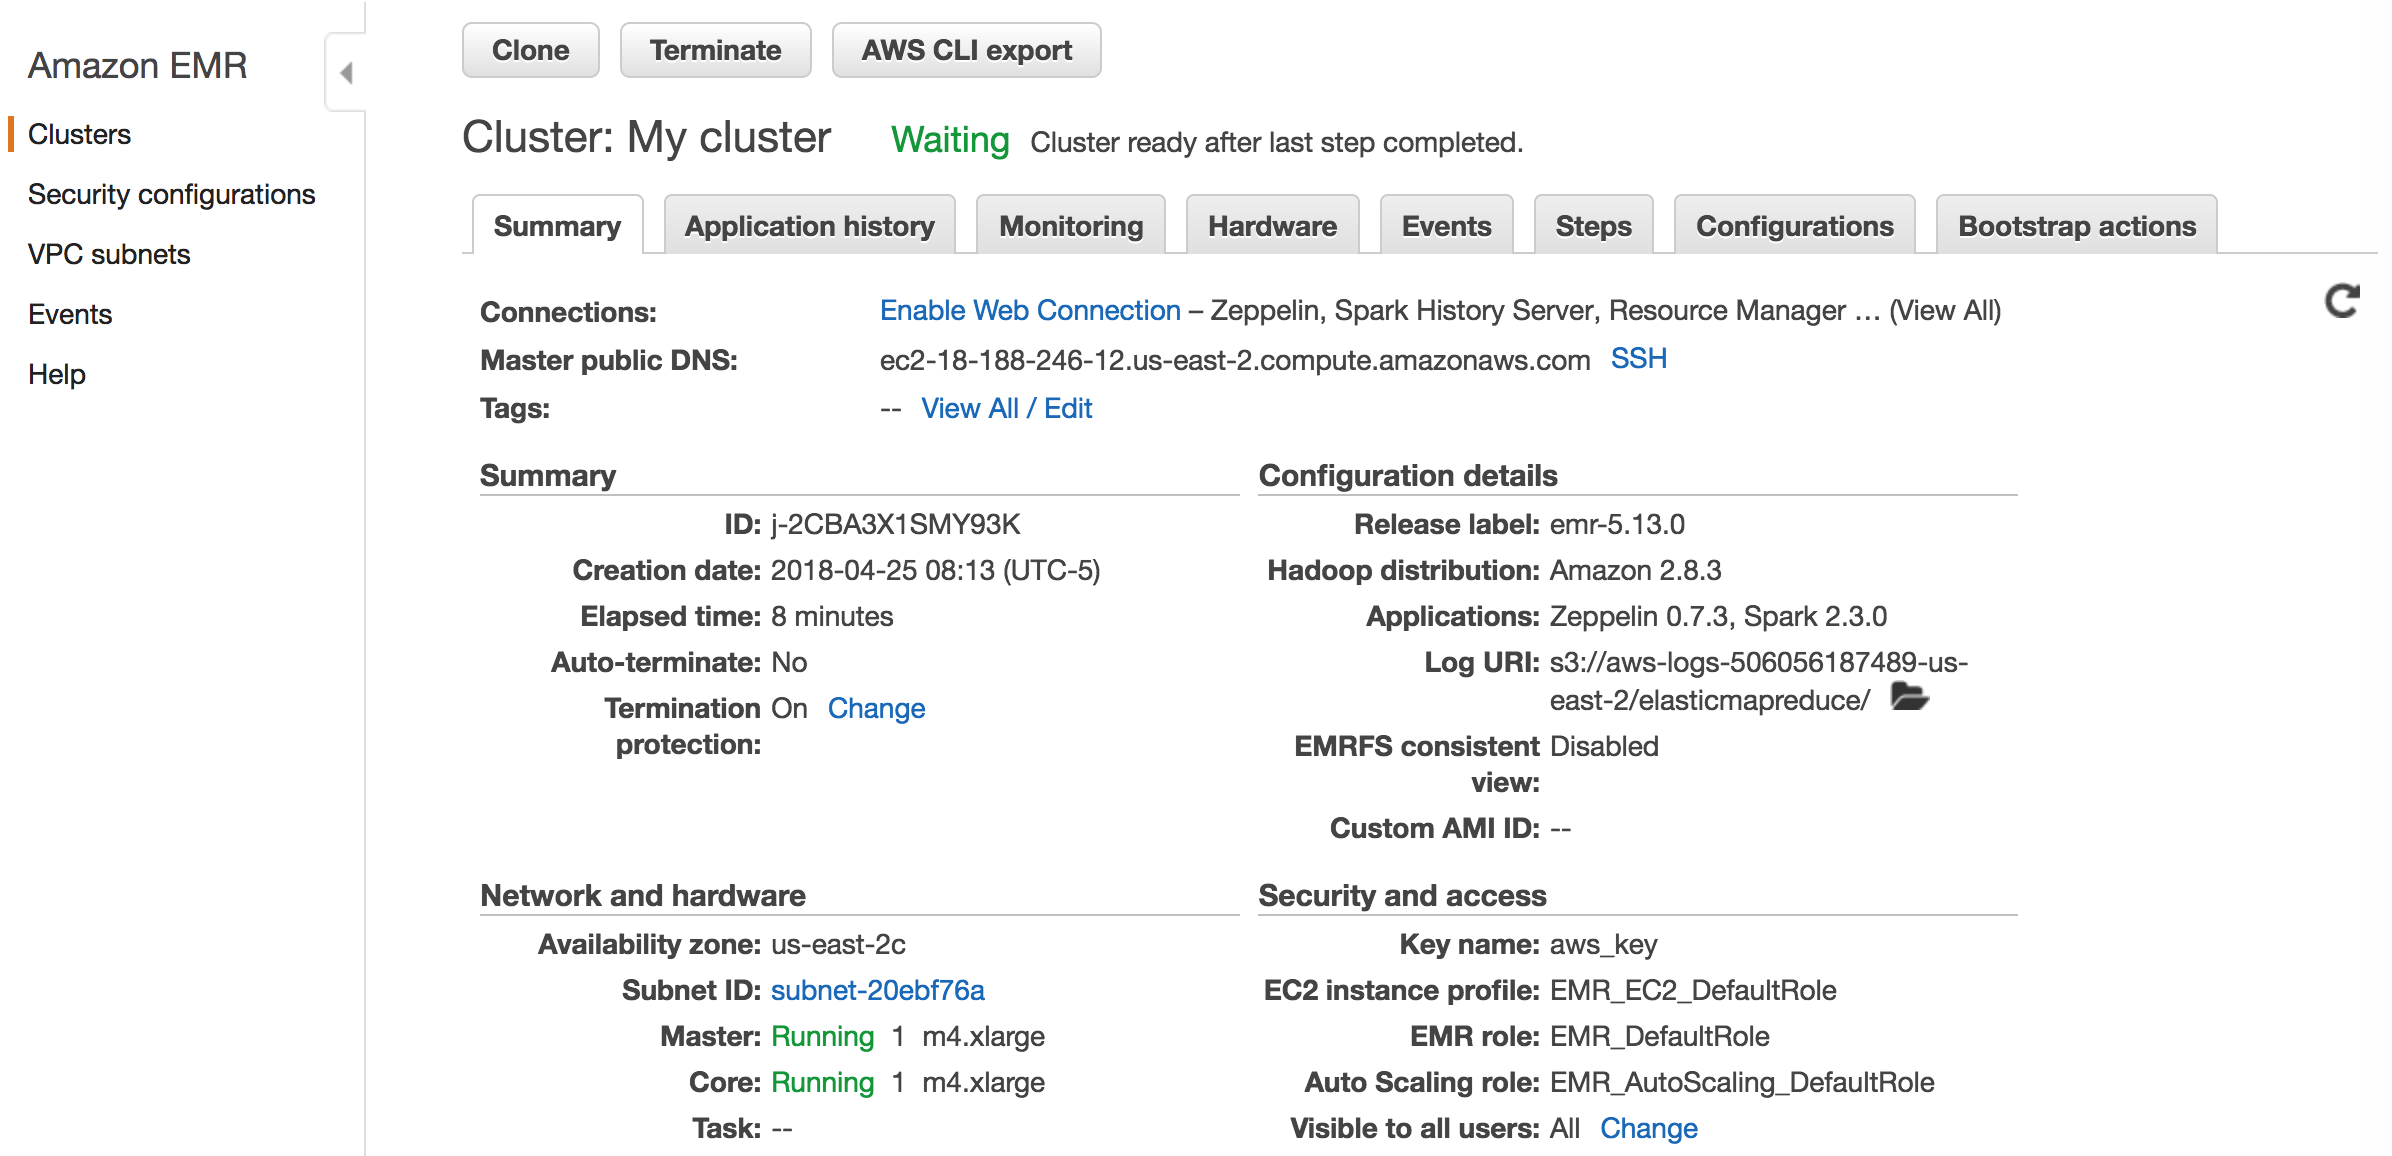
- Congratulations, you have a cluster running Spark!
3 - Update MyIP (Optional)
I like to set a location-specific IP for each cluster I build. This is completely optional. However, should you choose to do this, you’ll have to update your IP manually or by security group. Here’s how to do that manually:
- Still in the EMR dashboard, locate
Security groups for Master:. Click it. - On next page select Master group.
- Towards the bottom of the page select
Inboundtab. - Then click
Edit. - Select
MyIPfor SSH type. - Click
Save.
4 - SSH Into Your Cluster
- Navigate to EMR dashboard.
- Click
SSHbutton.

- Copy the command in the code block. Be sure to update the path to your key if it’s not located in your Home.
- Open Terminal and paste command.
- A prompt will ask if you want to continue connecting. Type
yes. - A large EMR logo will pop up in your Terminal window if you followed all the steps.
- Congratulations, you have setup your first EMR cluster and can access it remotely.
5 - Install Miniconda on Master (Optional)
Let’s install Python and conda on this Master node now that we’re logged in. Copy and paste the following commands to install and configure Miniconda.
wget https://repo.continuum.io/miniconda/Miniconda-latest-Linux-x86_64.sh -O ~/anaconda.shbash ~/anaconda.sh -b -p $HOME/anacondaecho -e '\nexport PATH=$HOME/anaconda/bin:$PATH' >> $HOME/.bashrc && source $HOME/.bashrc- This process is successful if when you type
which pythonyou get ~/anaconda/bin/python. - You can now install any python package you want with
conda install package_name. - Congratulations, you now have Python and conda on your Master node.
Note that miniconda is not installed on the Core node.
You can do that separately or consider creating a bootstrap script that will automatically take care of this for you upon build.
6 - Access Zeppelin Remotely (Optional)
- Open your browser that has FoxyProxy installed.
- Click
FoxyProxy icon. - Click
Use proxies based on their pre-defined patterns and priorities. - On EMR dashboard, click
Enable web connection. - Copy the command in the code block.
- Open new Terminal tab.
- Paste command which opens and forwards port
Note: it will look like it’s not working but it is so leave it alone!
- On EMR dashboard, the
Zeppelinbutton should now be blue. Click on it. - You are successful if Zeppelin opens in a new tab in your browser.
- Congratulations, you can access your EMR cluster through Zeppelin!
7 - Update Zeppelin for Anaconda (Optional)
We have to update the Python path in Zeppelin to leverage the new version we installed in step 5.
- At the top right of Zeppelin, click
anonymous. - In drop down, select
Interpreter. - Search for python.
- Click
Edit. - Change zeppelin.python from
pythonto/home/hadoop/anaconda/bin/python - Click
Saveon bottom left. - Select dropdown for Interpreters again.
- Search for spark.
- Click
Edit. - Change zeppelin.pyspark.python from
pythonto/home/hadoop/anaconda/bin/python - Click
Saveon bottom left. - Navigate back to Zeppelin Home by clicking
Zeppelintop left. - Congratulations, you have all the tools you need to run PySpark on a Spark cluster!
8 - Best Part
Admittedly, while that’s not a complicated process, it is time consuming. The good news is that you never have to configure FoxyProxy again AND there are neat little tricks you can add to make the build process much easier. For example, you can add a bootstrap script that will install and configure miniconda on all nodes during the build process itself.
Furthermore, if you want to spin up another cluster that is similar or identical to the one we just built, all you have to do is:
- Navigate to the EMR dashboard.
- Select the cluster you want to mimic.
- Select
Clone.
You can start building another cluster in seconds!